Overview
This document provides step-by-step instructions for updating the license on the Veeam Appliance through the web console interface.
Prerequisites
- Valid Veeam license file saved to the local machine
- Administrative access to the Veeam web console
- Active network connection to the Veeam Appliance
Procedure
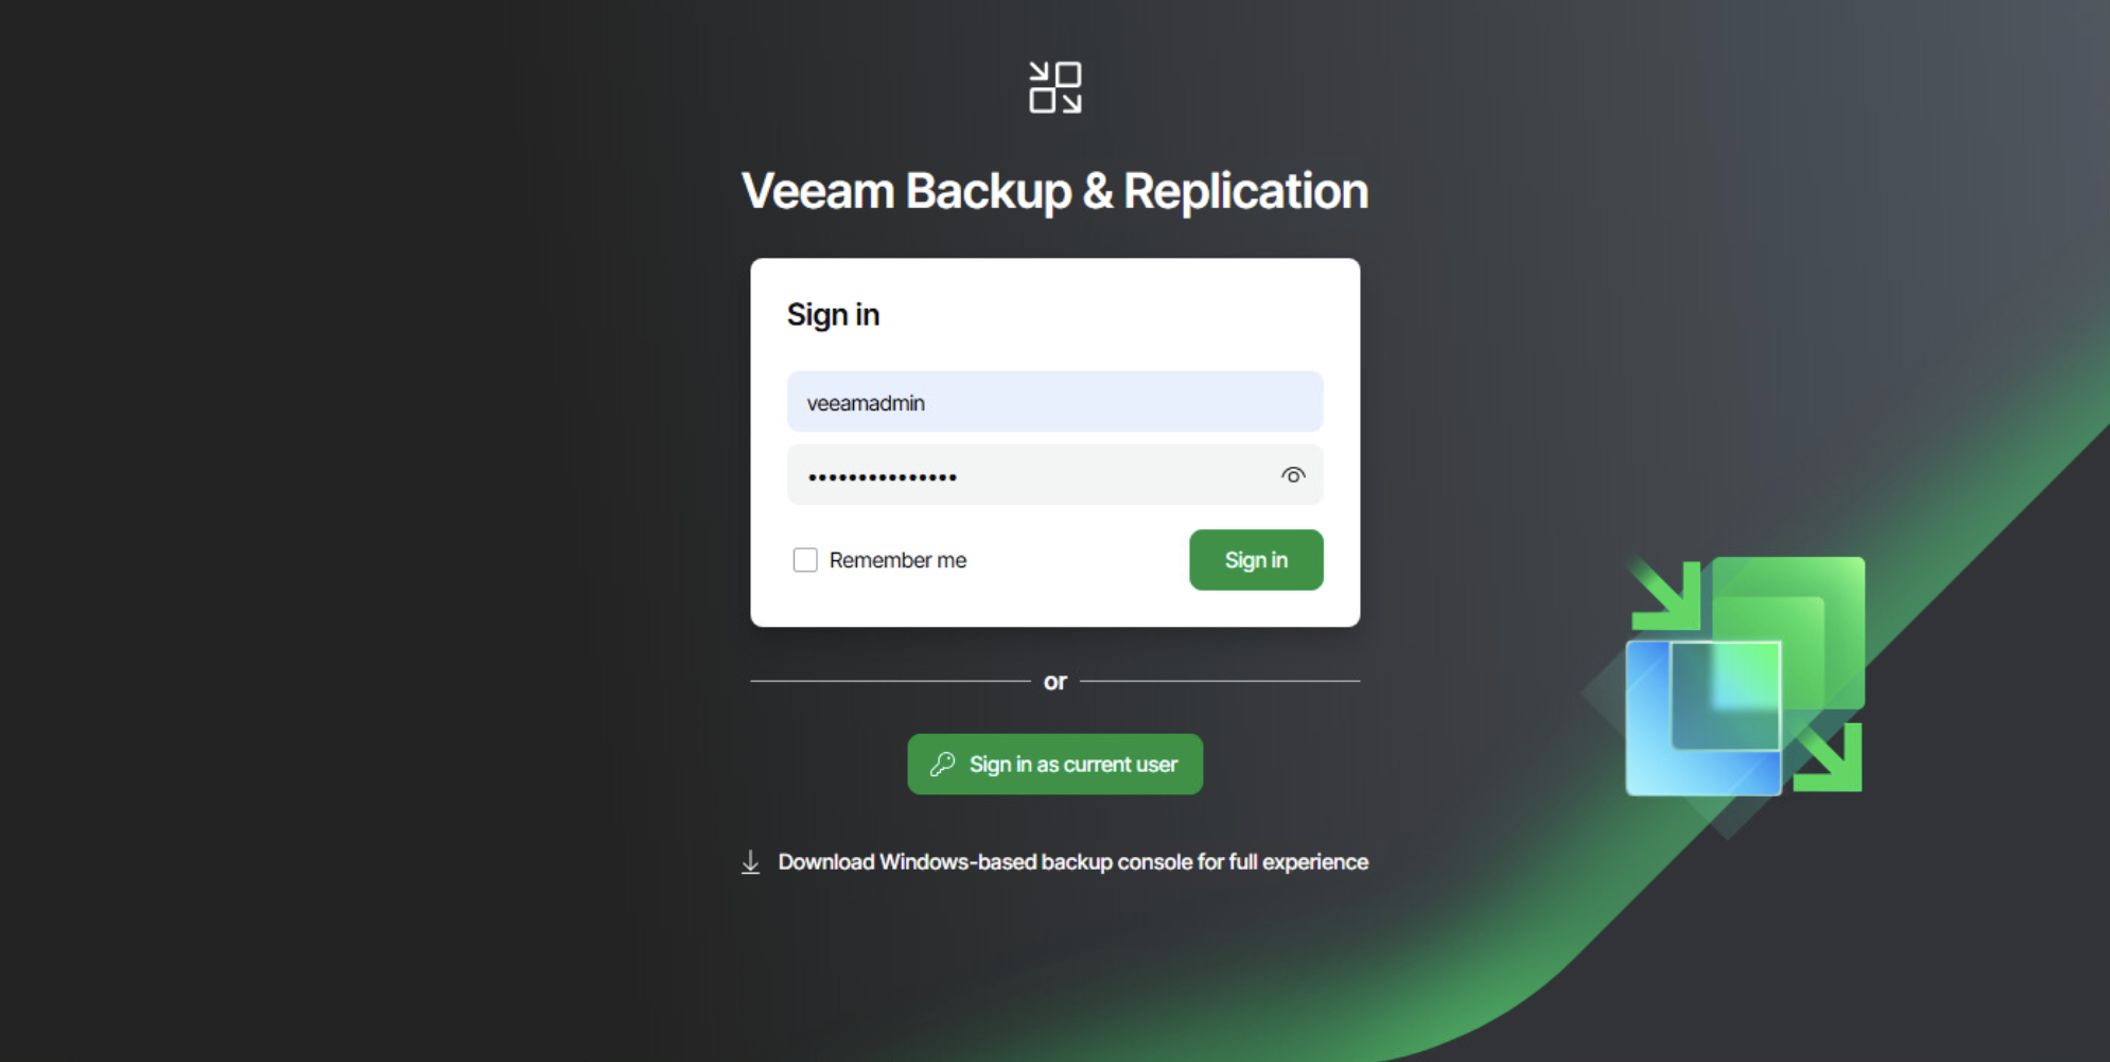
Step 1: Access the Web Console
Sign in to the web console using the web interface with your administrative credentials.
Step 2: Open Configuration Settings
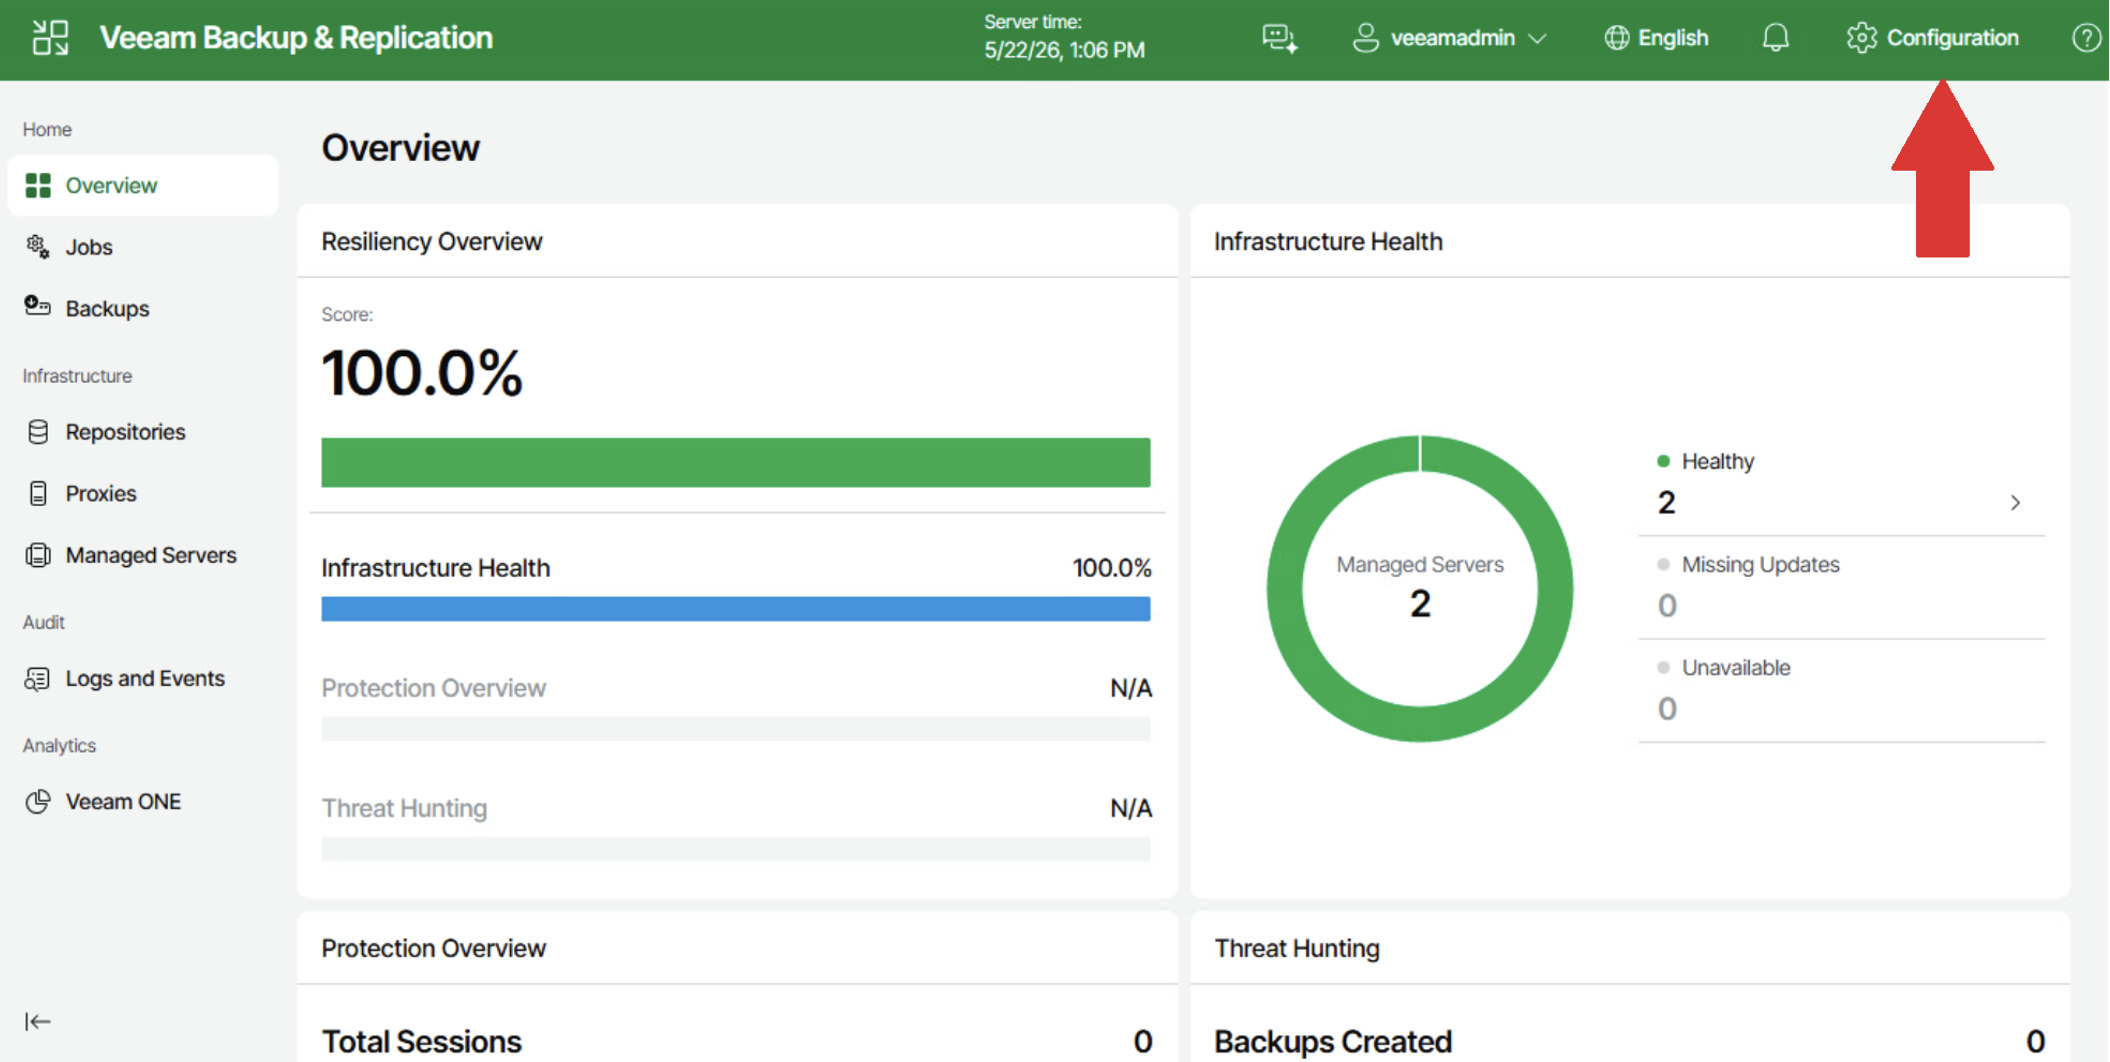
In the top-right corner of the web page, select the Configuration option.
Step 3: Navigate to License Information
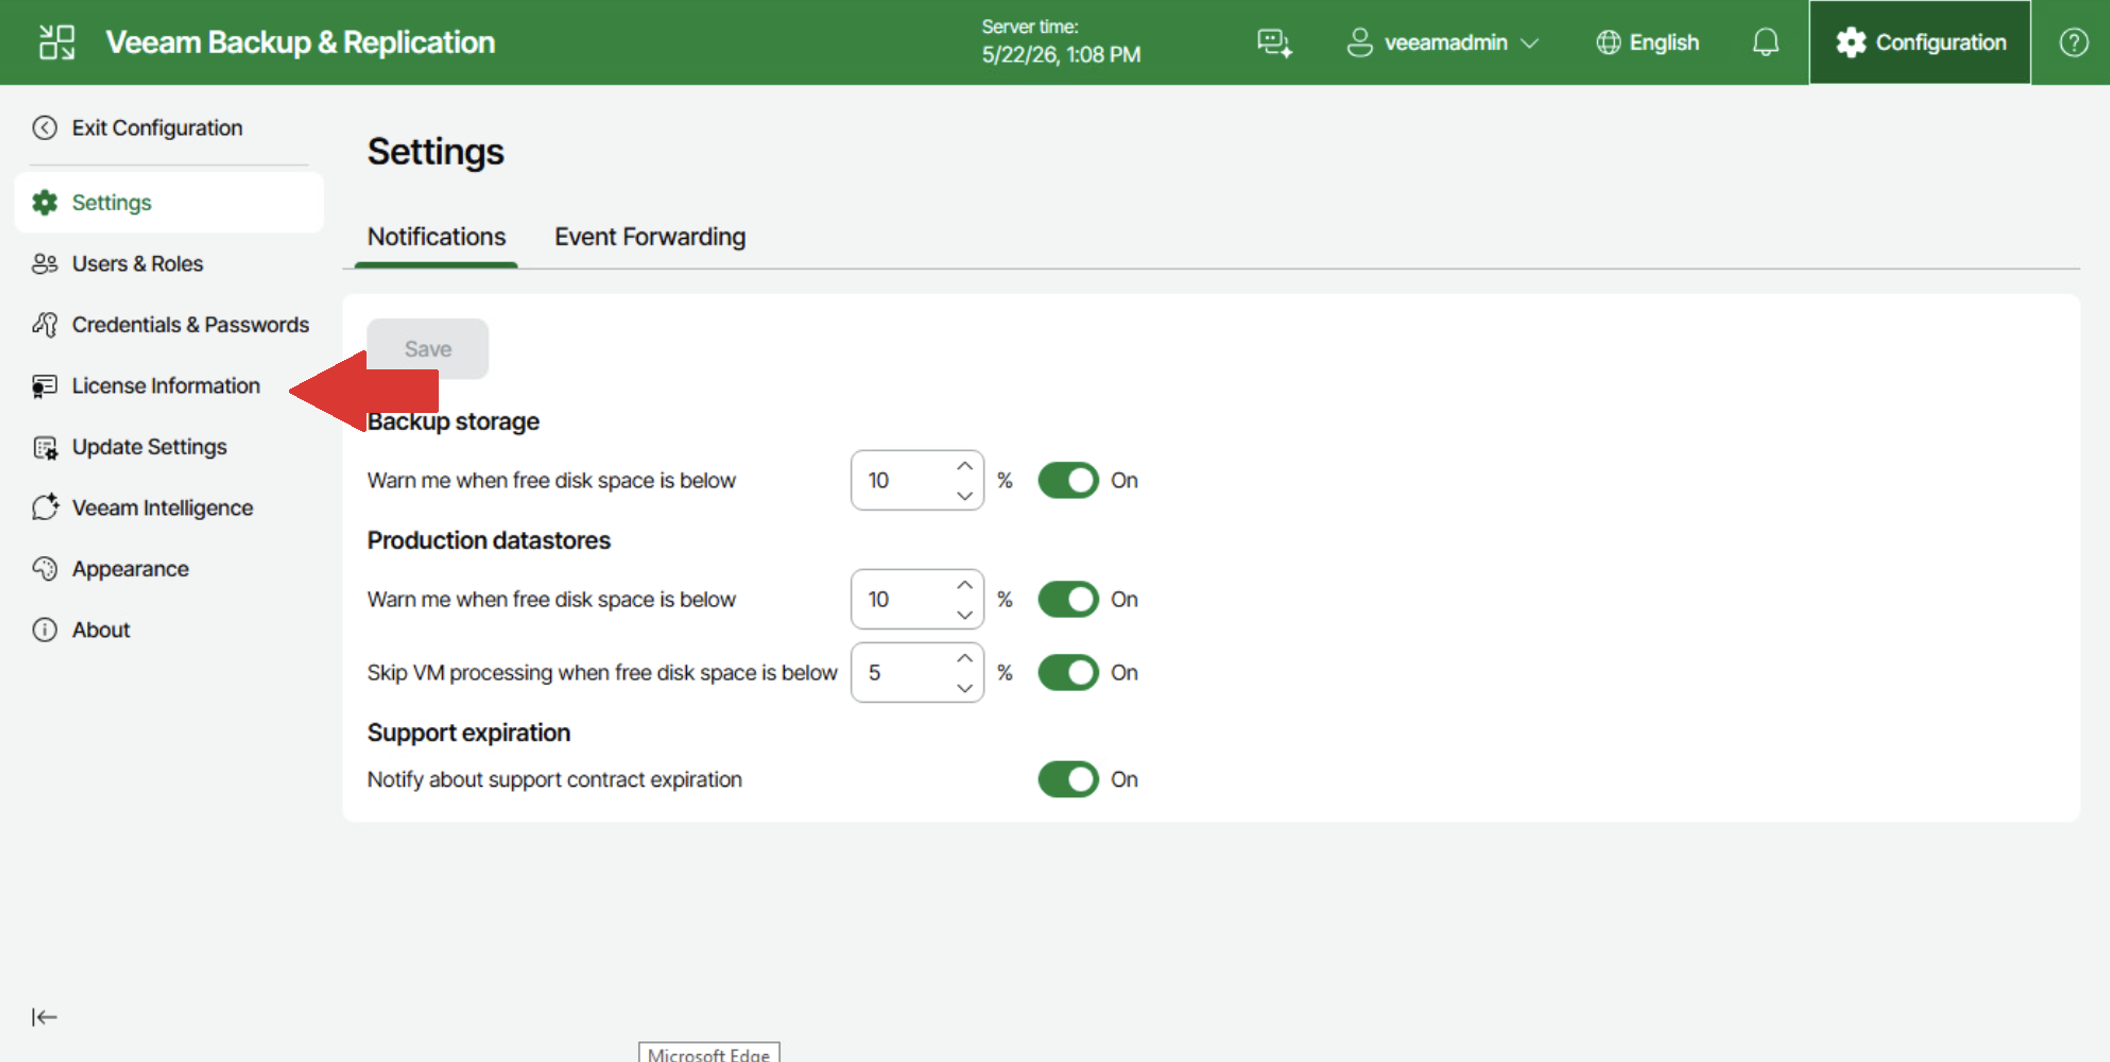
In the new window, select License Information from the menu on the left side of the screen.
Step 4: Begin License Installation
Click the Install button located in the middle of the screen.
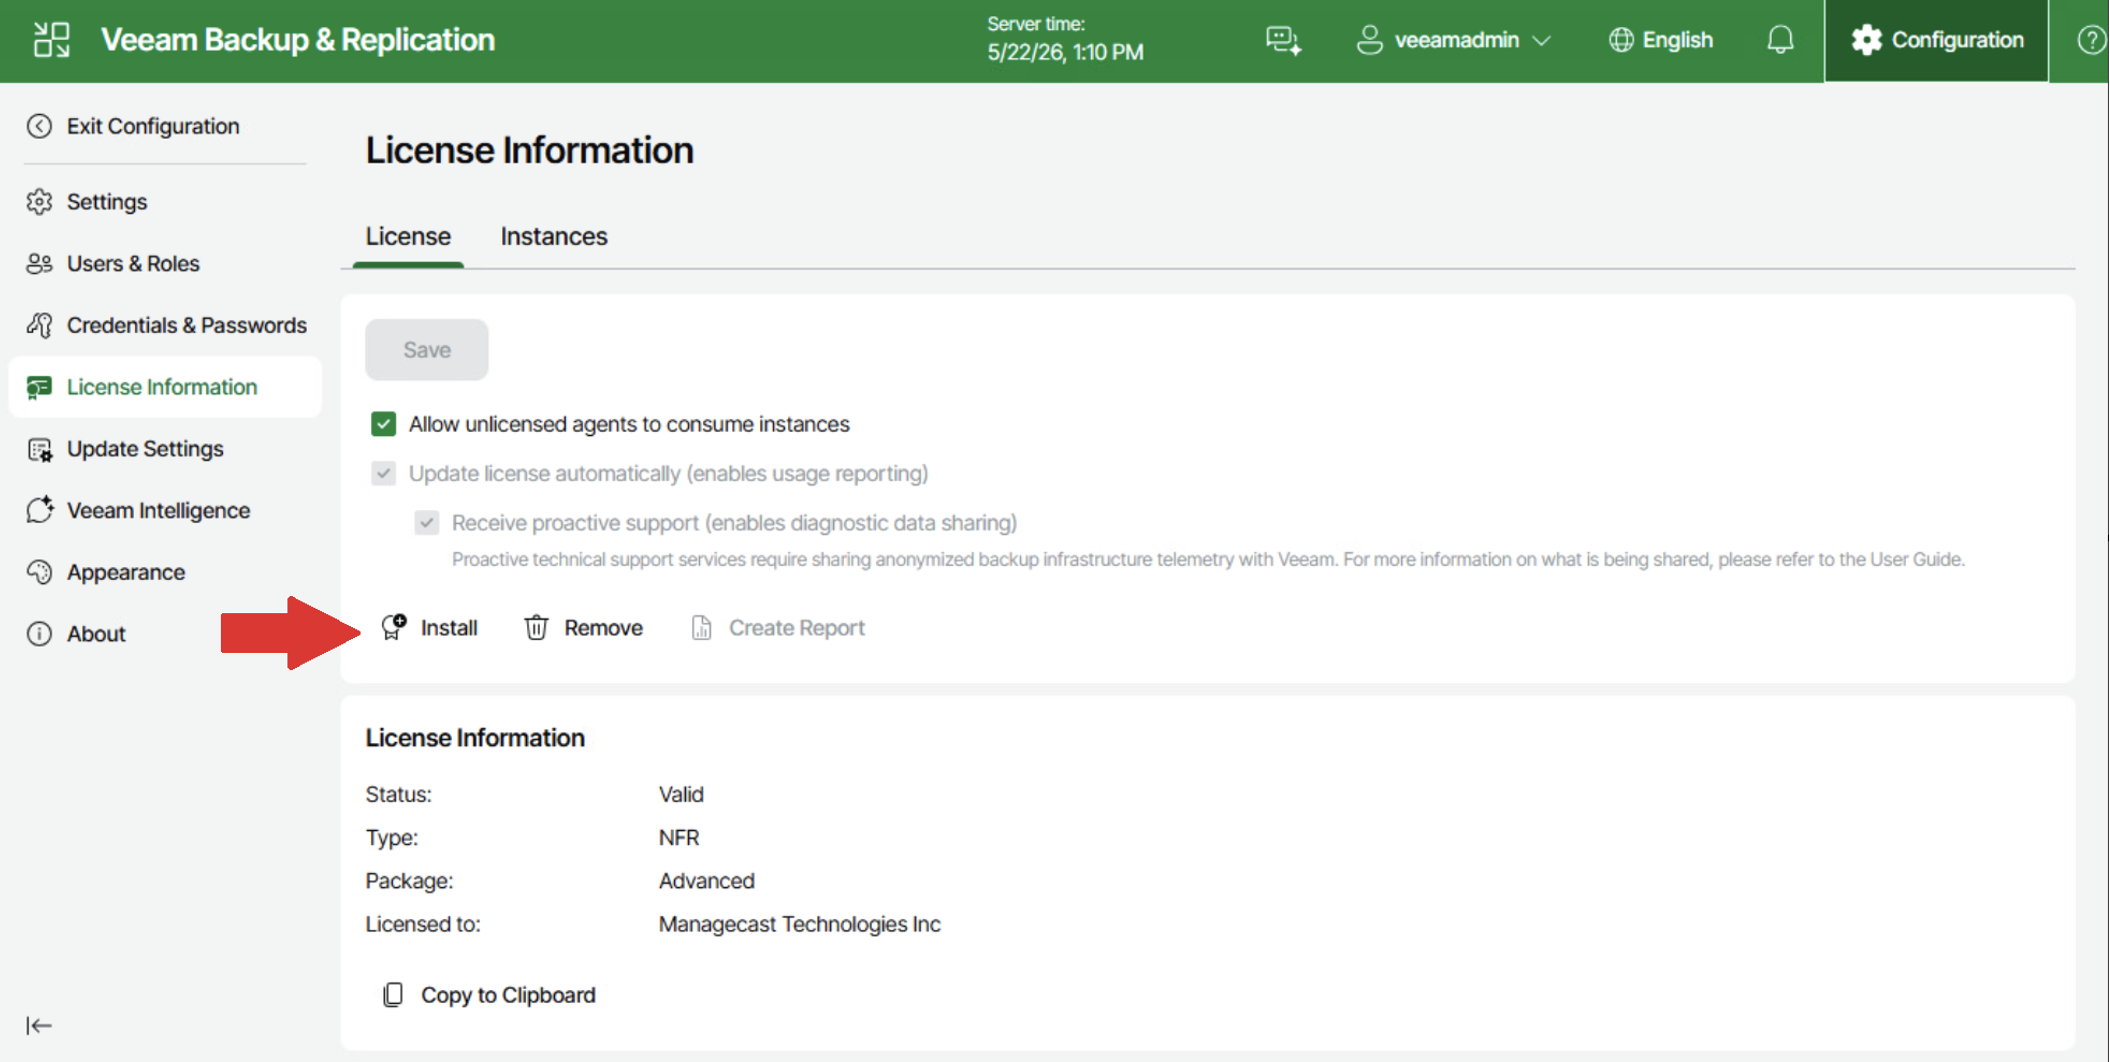
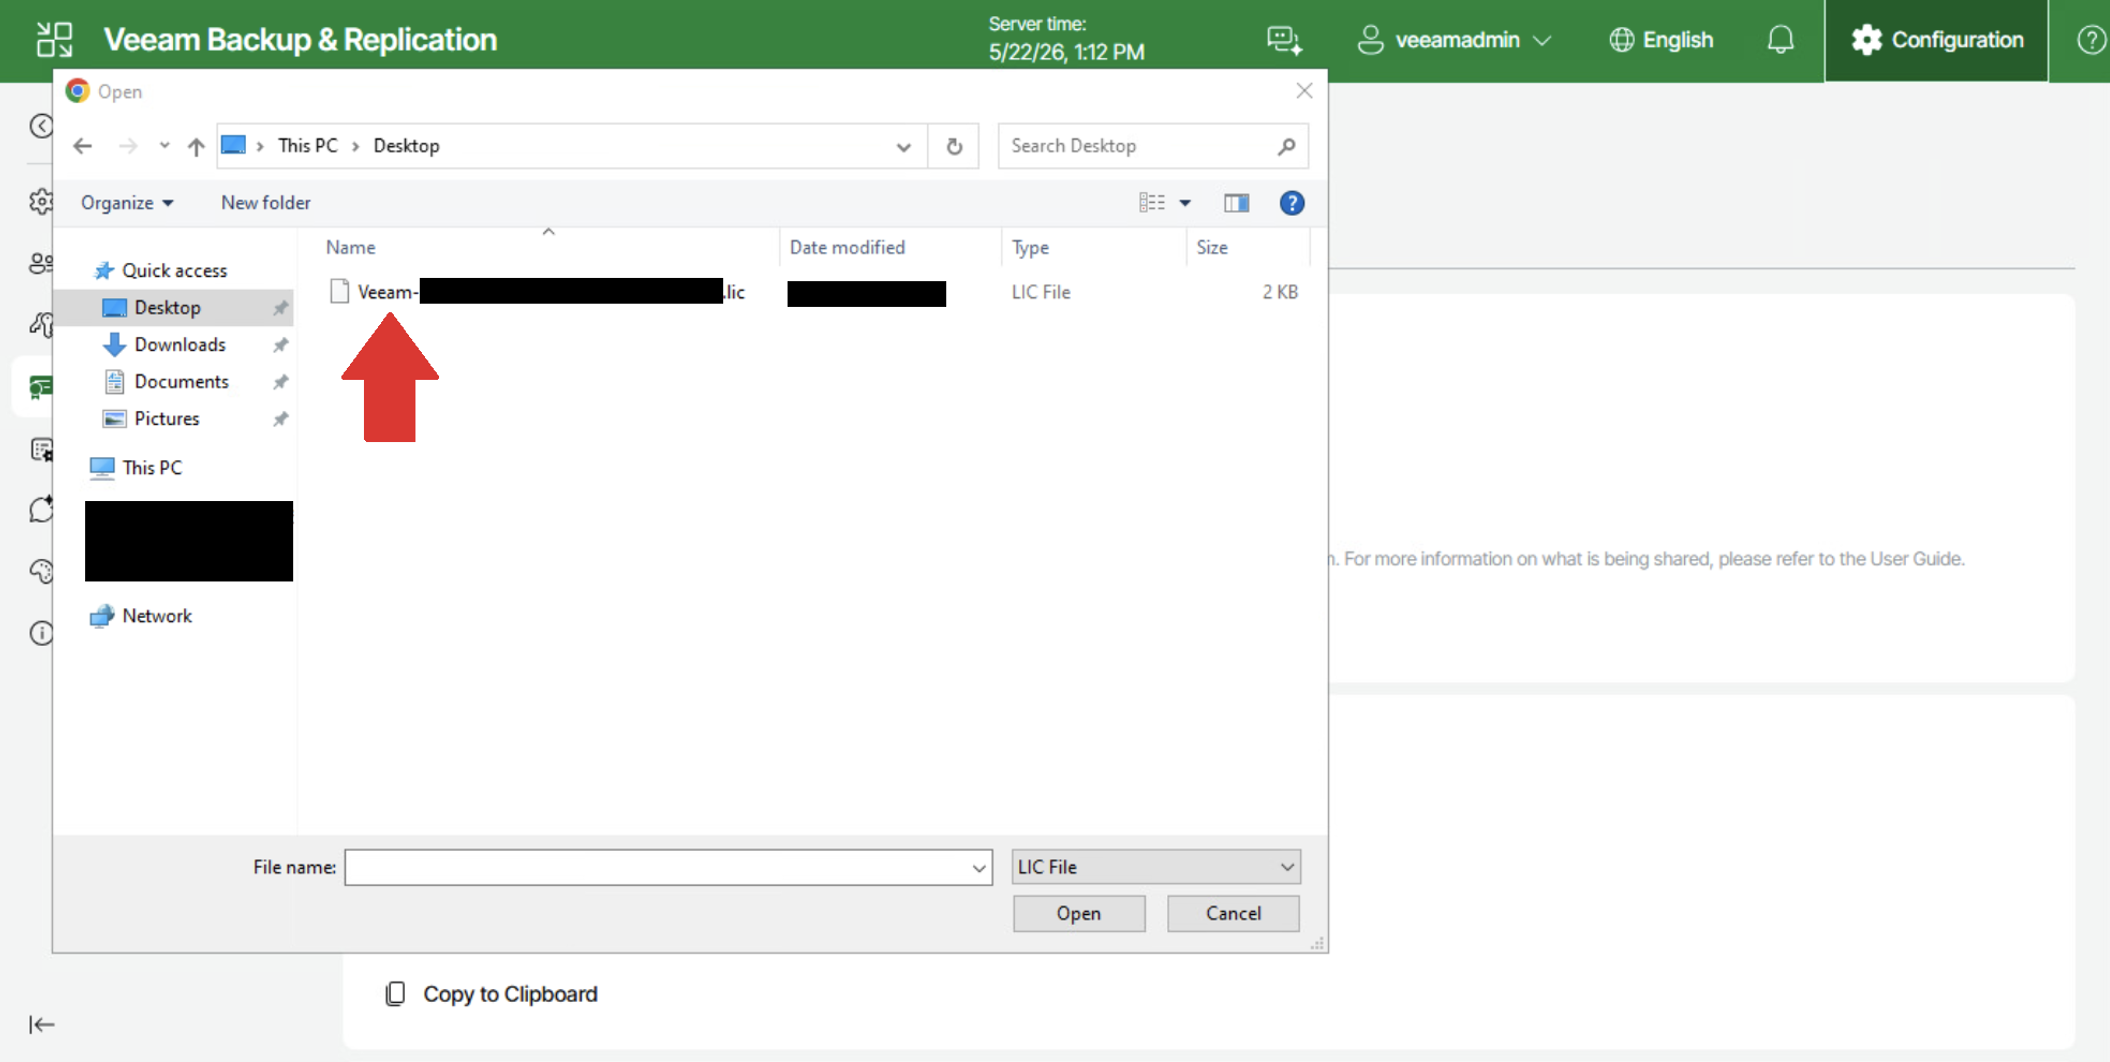
Step 5: Select the License File
In the pop-up window, navigate to the location where the license file is stored on the local machine and select it to complete the installation.